It has been quite some time since I've updated my blog. If you've had an occasion to visit my website you will have noticed periodic additions of new images and galleries from my travels in the American West and in the Pacific region.
About a year ago Kathy and I decided that we wanted to relax and travel more. At the same time I was hesitant to give up Earth & Light Gallery which I've immensely enjoyed. The gallery has enabled me to meet wonderful people from all over the world. Almost without exception everyone has been gracious. I take pride in the fact that thousands of people have enjoyed my photographic work enough to purchase prints, cards and DVDs. I thank you all for that support.
In early February, 2015, Kathy and I will be closing our gallery location in the Kayenta Art Village. However, it won't go away. Cherie and George Stoddard at Gallery 873, located literally across the street in the Kayenta Art Village, will continue to display, sell and accept custom orders for my images. I will, of course, continue to expand my website with new images from travels and return trips to shoot here in the American Southwest.
As I told close friends a few months ago, my two personal favorite locales in the world are the red rock country of Utah and the St. George/Ivins area in particular, and tropical islands. It's now time for the Islands Chapter in our lives—Kathy and I will be moving to Hawaii at the end of February.
 We have chosen to move to Hawaii – The Big Island. The Big Island is home to 11 of the world's 13 climate zones. There are as many different climate zones of the island of Hawaii as exist along the entire west coast of North America stretching from Alaska to Costa Rica. This diversity in landscape and weather provides wonderful photographic opportunities. We have chosen a new home located safely away from Pele's current lava flow.
If you live in the St. George/southern Utah area, I invite you to come by and visit once again before we move. You can continue to reach me by email or phone. Thanks again for ten wonderful years here at Kayenta in Ivins.
]]>
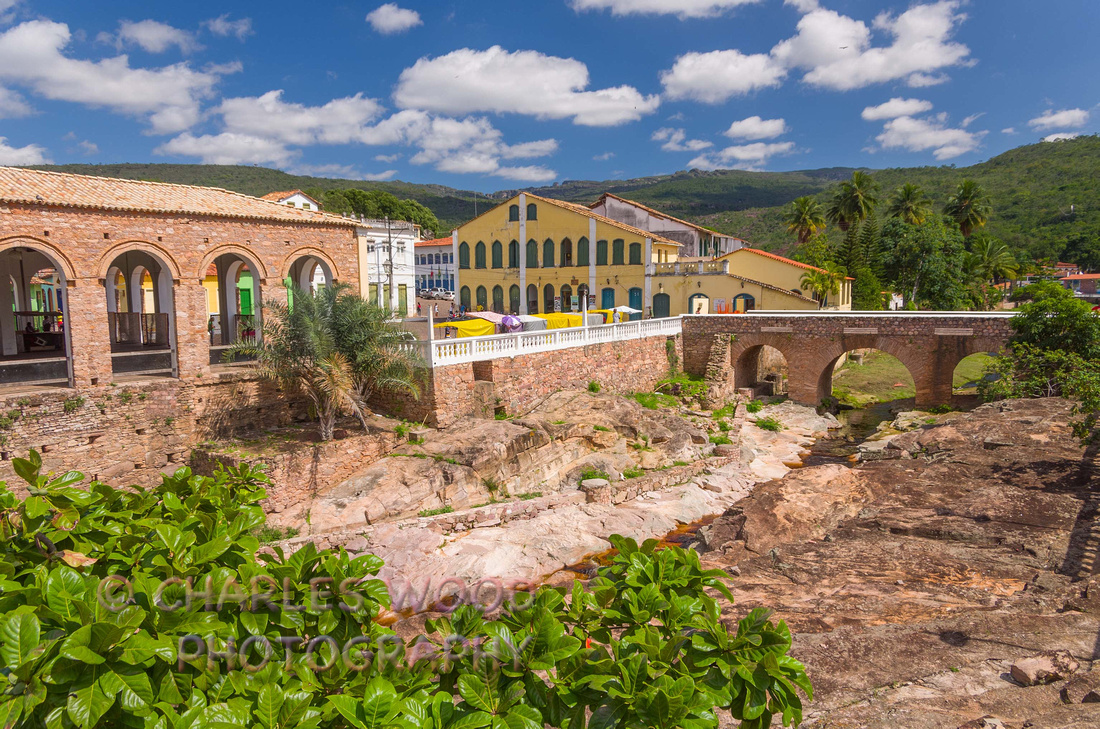
Our trip was not quick. On top of the usual and unpredictable airline delays, the trip requires four to five flight segments, depending where you live in the USA. My trip started in St. George Utah, on to Salt Lake City and Atlanta, then overnight to Brasilia and a connecting flight to Salvador on the Brazilian coast. And finally, a connecting flight which I had severe doubts of making...but did...to Lencois, the gateway town to the Chapada Diamantina region. My total travel time from St. George to Lencois was 36 hours.
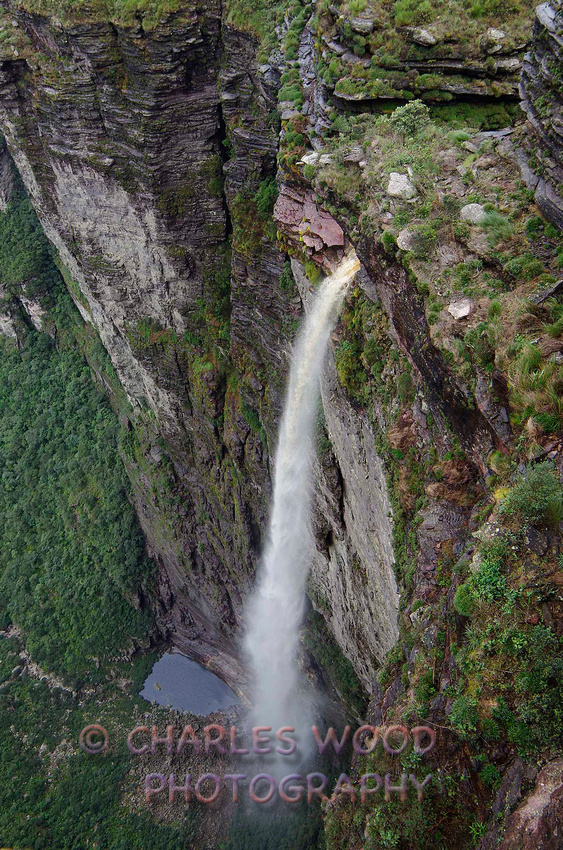
After recovering from our flights, we spent the first day on a half day trek to have a look at water falls near the town of Lencois. The water runs dark red to near black as a result of the decaying matter and resultant release of tannic acids. Many of the attractions are in the Chapada region rather than within the boundaries of the park. The sights include underground water pools that yield a beautiful blow glow when struck by sunlight, as a result of naturally occurring minerals in the water. Park travel distances can be far, sometimes well over a 100 miles to reach one specific feature.
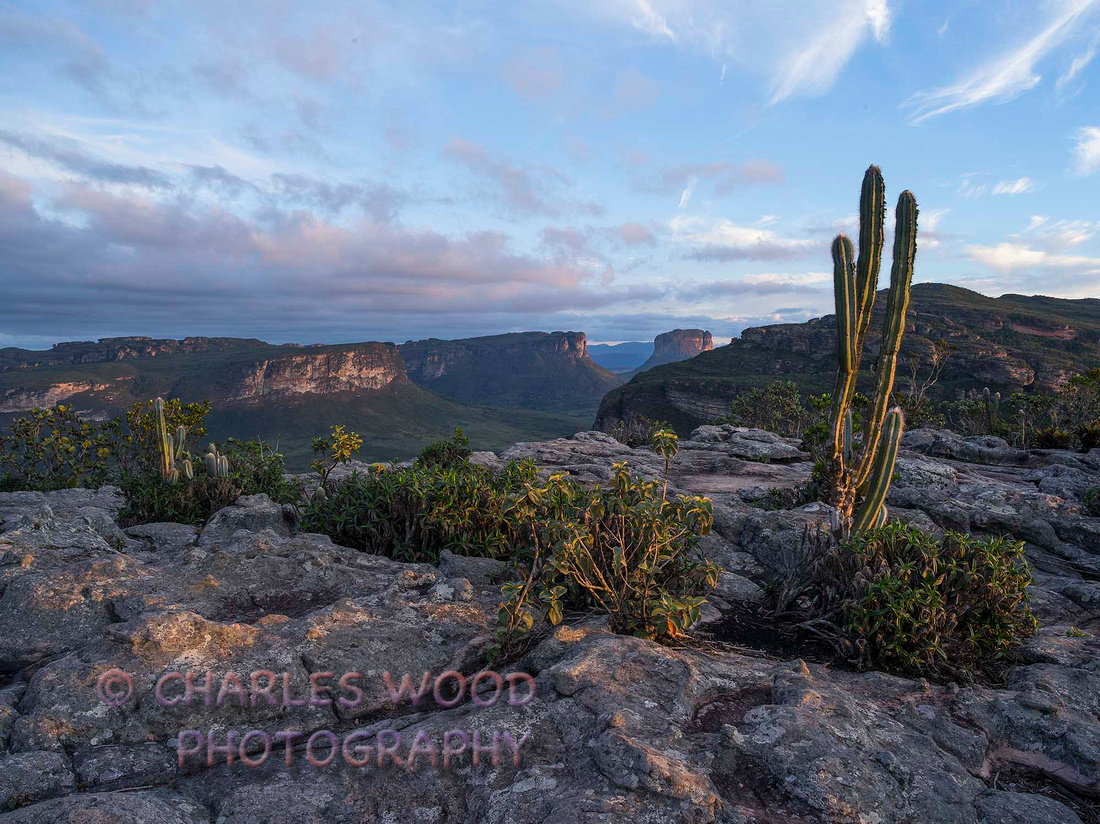
Chapada Diamantina is a huge park with some hikes lasting several days or more and requiring substantial physical effort. If you visualize a combination of Canyonlands National Park and Monument Valley in Utah, but with greenery and forests rather than desert, and you throw in some waterfalls and rivers for good measure, you have a sense of what Chapada Diamantina is all about....mesas, valleys, caves, vertical formations and lots of water. Many of the roads and trails within the park were developed by diamond miners in the early to mid 1800s.
Here are a few selected pictures from my visit to Chapada Diamantina. More will follow in a new gallery that I will add shortly to my website, along with complete descriptions. Next week: Lencois Maranhenses National Park located on the northern Brazilian coast and unlike any other place on the planet.


MPIX, the online fulfillment service for Zenfolio, the organization that hosts my website, announced last evening a short lived special of 20% off any purchase made before 11:59 PM CDT, June 12. You may use the coupon code: E&LGallery . You will receive a 20% discount from the purchase price at checkout of any paper print ordered through the website and fulfilled by MPIX. I highly suggest you take advantage and in particular, try the new Fuji Lustre Metallic Paper. The colors and depth are stunning. For those of you interested in images on canvas I will match the same discount to any canvas purchase (wrapped or unwrapped) through June 16th but you must call me directly at 435.673.2805 or email me detailing the image and size you are interested in and I will respond.
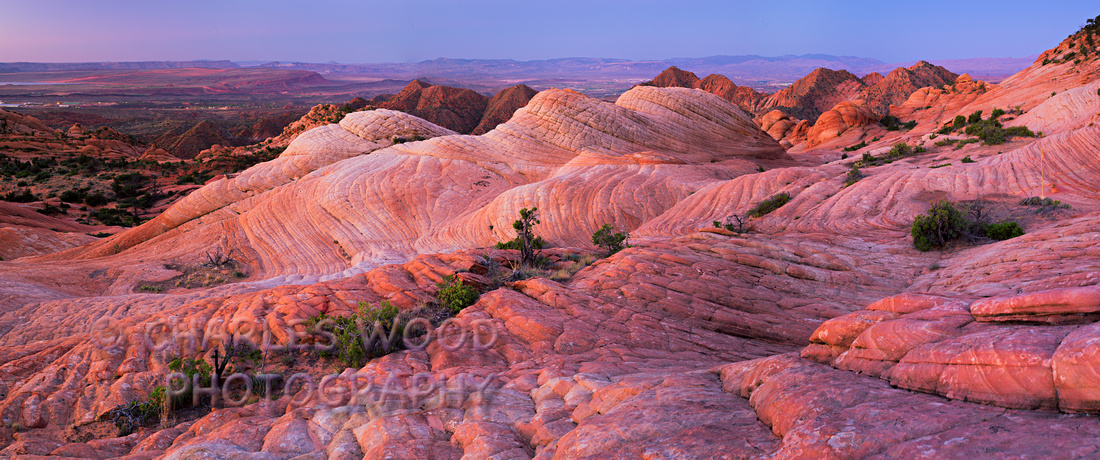
I recently made my first of several trips to an area called Yant Flat. It is near St. George, Utah and is a geologic formation that more rivals The Wave, White Pocket, Coyote Buttes, or any number of areas in the American Southwest. I've started a gallery of images from Yant Flat and I will be adding more. Here is a panorama from a sunrise at Yant Flat. I invite you to check out my new Yant Flat gallery at www.cdwood.zenfolio.com.

Foggy Morning at Snow Canyon
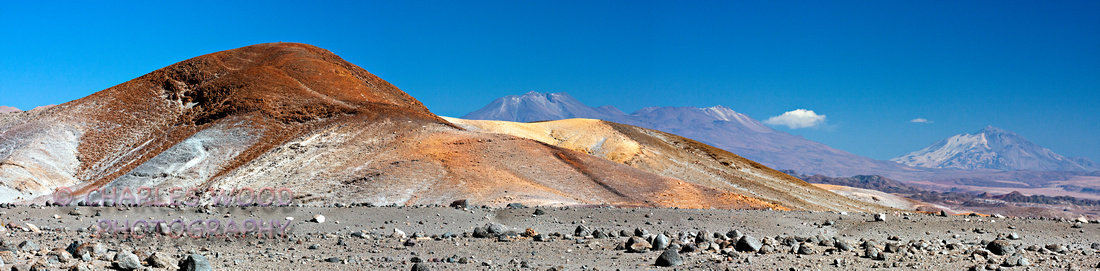
Panoramic view of the stark Atacama desert in northern Chile
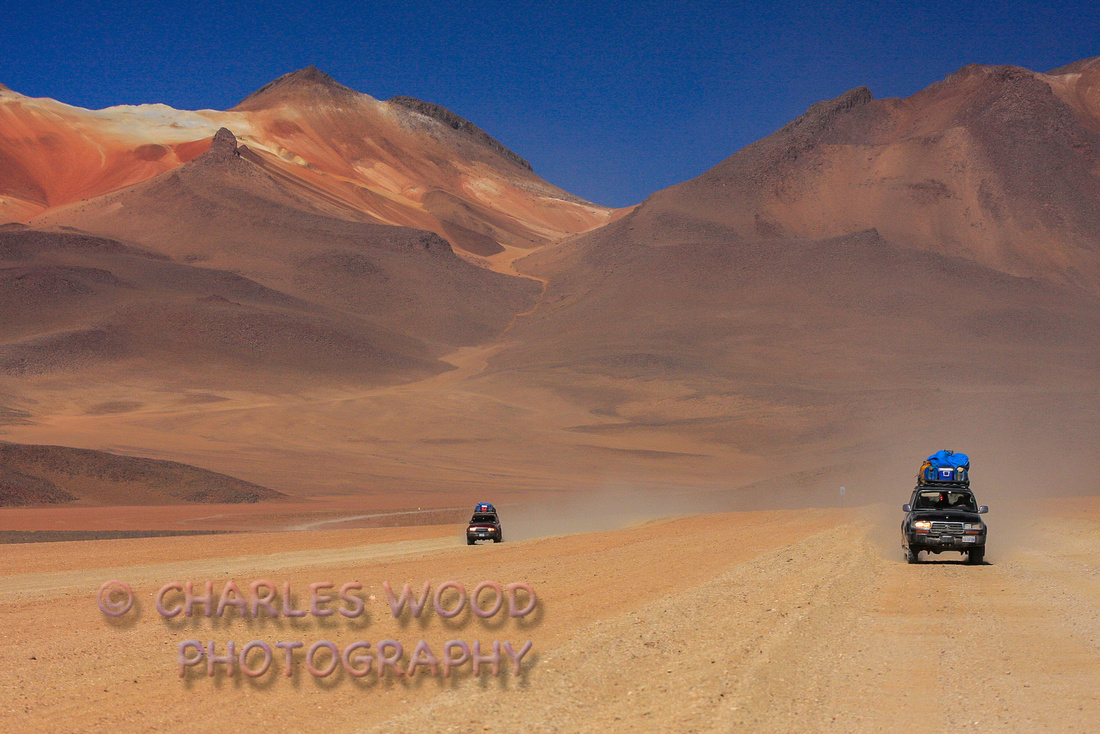
Rush hour on the Dali Desert in SW Bolivia - Elevation approx. 14,000 feet
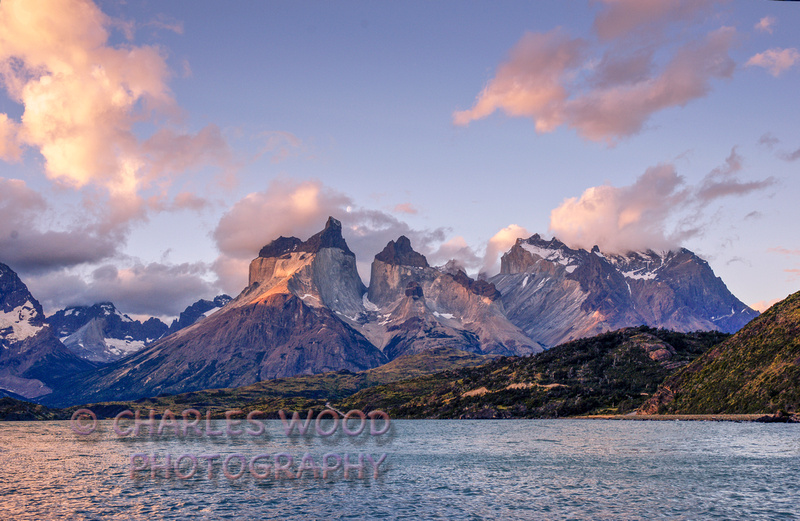
Sunset at Torres del Paine , Chilean Patagonia
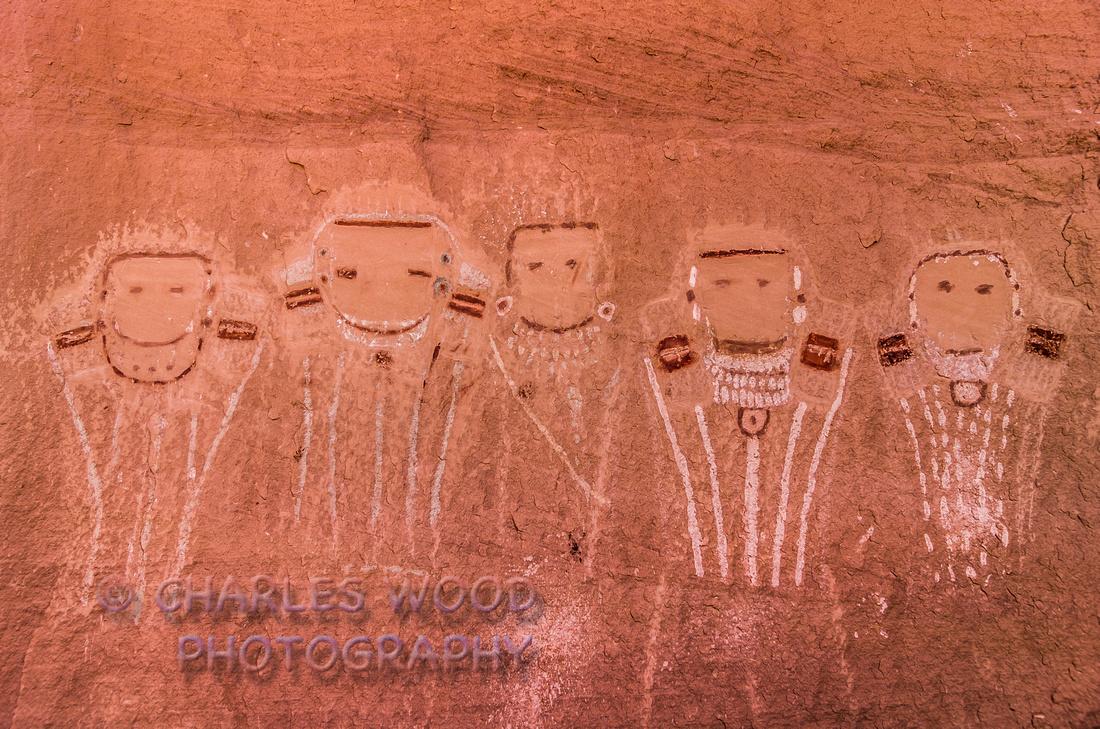 The Five Faces - Davis Canyon, Canyonlands National Park
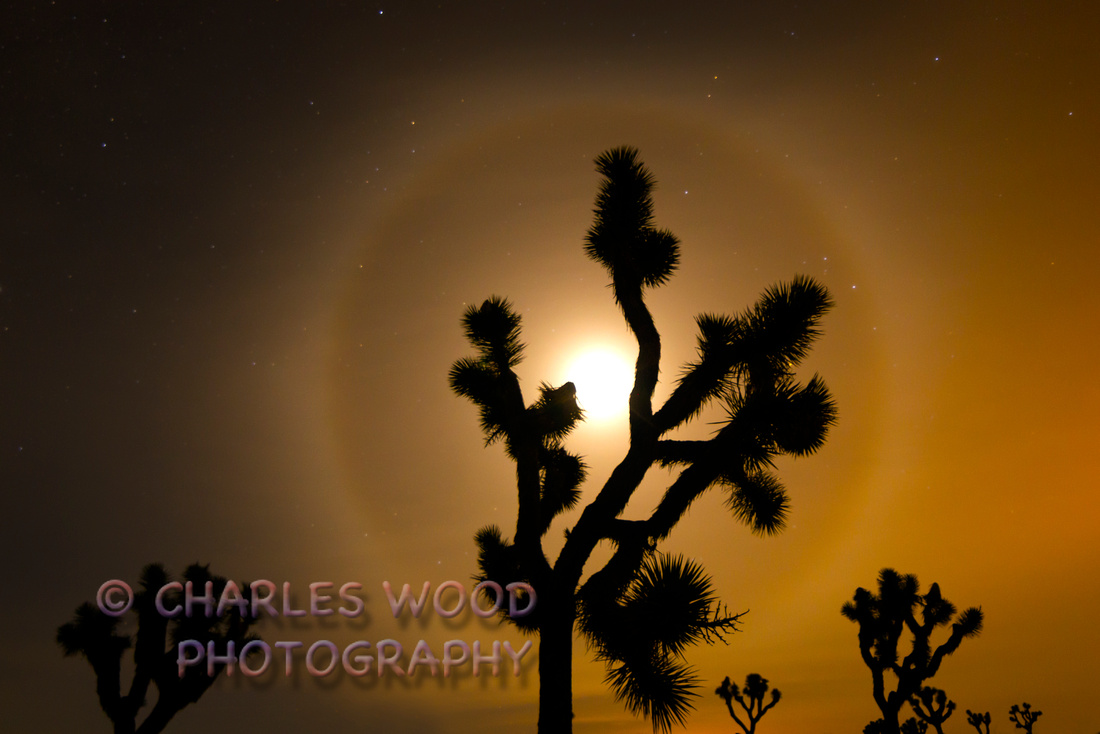 Joshua Tree by Moonlight - Joshua Tree National Park
I am frequently asked if I offer photography classes and in the past I've been reluctant to try and offer a structured class. Recently, however, after some discussion with Tyler Webb, a talented young photographer/videographer and outdoor guide, who assists me at Earth & Light Gallery on a regular basis, we've decided to offer a basic photography class. This class will quickly get you up to speed with the skills needed to effectively photograph landscape and nature settings in the southwest. We're finalizing time frames and details but we expect to offer classes twice a month. We will also cover the very important basics of simple, effective image processing. If you want to maximize your efforts, you never let your camera make all the decisions!
More details with dates and locations of classes will be emailed within the next two weeks.
]]>
The first of the fall season was a twelve mile round trip day hike along the historic Boulder (Utah) Mail Trail to the mouth of Death Hollow and return. Until the 1920s, mail was delivered to Boulder, Utah from Escalante, Utah by pack animals over a very arduous and sometimes dangerous route. The Mail Trail, as it is called, roughly follows the same path of the early telephone line that connected Boulder to the outside world. The hike begins over a moderately easy route for the first several miles, gradually descending across high desert grassland and then arriving at an area of slick rock and a climb up to a higher plateau, then descending again hundreds of feet down over another expanse of slick rock into Death Hollow. I've posted a series of documentary images from this hike in a new gallery addition to this site:
http://cdwood.zenfolio.com/p2335131
Late September/early October is typically the time of year to view autumn colors at higher elevations. I recently did a full moon hike from the trail head at Lava Point in the Zion National Park back country, to the West Rim. My last hike of the Zion back country, from Kolob to the main canyon, was over ten years ago in springtime, with overnight camping along the way and hiking during the daytime. Hiking under a full moon with pleasant temperatures is an amazing and totally different experience. Using a powerful new LED headlamp that is actually bright enough to throw a beam of brilliant white light for several blocks, I was able to sweep the areas around the trails as we hiked, seeing deer and other tiny eyes reflecting the brilliant light back. The other 'tiny eyes' turned out to be spiders in the grasses and along the trail. The numbers of arachnids out at night is truly amazing!
The distance to the West Rim overlook is approximately eight miles but we arrived just in time for dawn and sunrise photography, and to witness the amazing transition of light and color from dawn to sunrise and daytime.
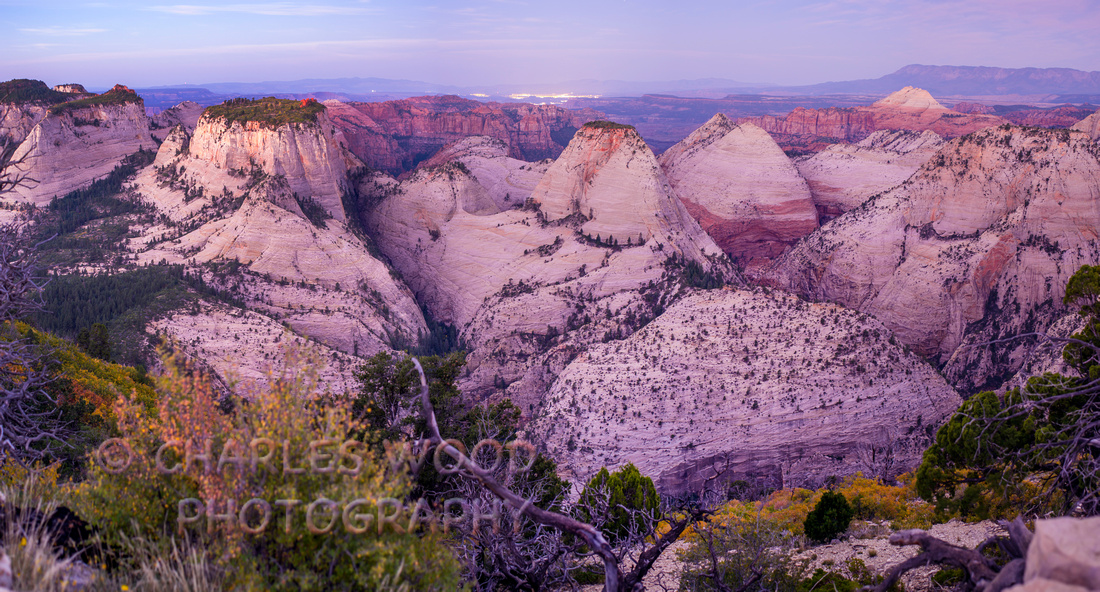
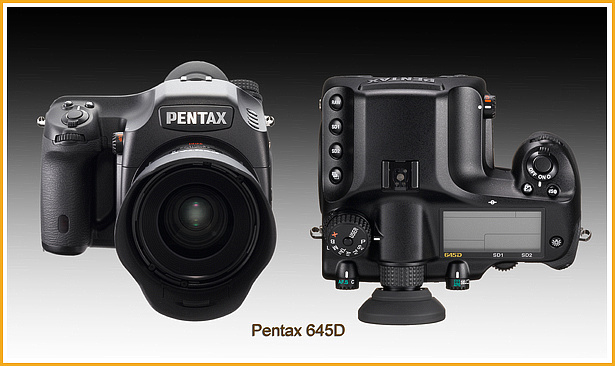
A VIEW AT DAWN FROM WEST RIM TRAIL, ZION NATIONAL PARK - SHOT WITH PENTAX 645D
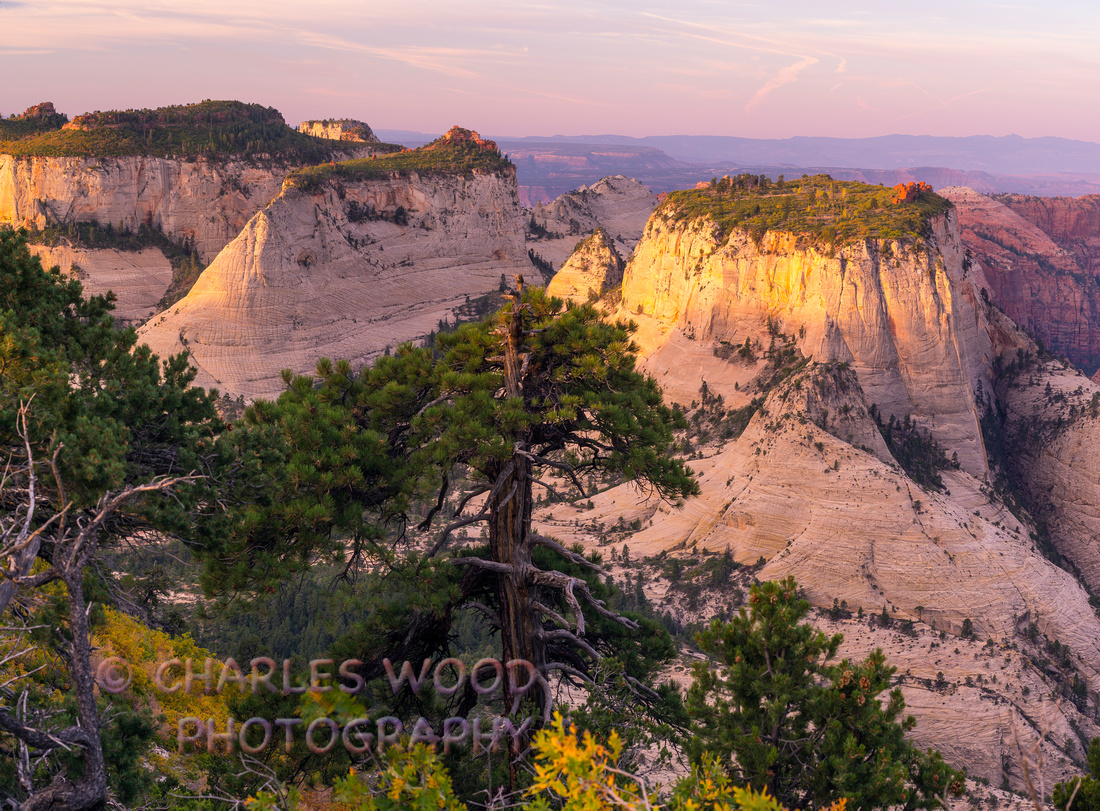 FIRST LIGHT AT SUNRISE, WEST RIM, ZION NATIONAL PARK - SHOT WITH PENTAX 645D
Retracing our route after completing our morning photo shoot, we were treated to some amazing fall colors, particularly on the return descent into Potato Hollow. The dramatic golds and red colors currently visible at the higher elevations in Zion National Park would seem to indicate that we will witness an outstanding year in the main lower canyon within a week or two.

FALL COLORS, WEST RIM TRAIL DESCENDING INTO POTATO HOLLOW
ZION NATIONAL PARK BACK COUNTRY - SHOT WITH PENTAX 645D, 35MM LENS/POLARIZER
PHOTO TIPS
Taking advantage of the magenta and purple hues from the pre-sunrise alpenglow means using a tripod and setting your camera on manual, rather than an automatic exposure mode. The level of light at pre-sunrise will be too low for handheld shots. You should also change your ISO (sensitivity settings) to ISO 100 or 200. Letting your camera automatically adjust the ISO to enable handheld shooting is a tradeoff. The camera will select a higher ISO setting resulting in potentially much noisier (equivalent to film grain) images with poorer color, contrast and detail.
To obtain the richest, most brilliant fall colors from trees and foliage, a polarizer is a must-have item. By shooting foliage at a 90 degree angle to the sun and adjusting the polarizer, you can dramatically reduce reflections that wash out or weaken color.
NEXT UP:
I will be away during the middle of the month for a back country hike in the Needles District of Canyonlands National Park, over near Moab, Utah. More to come.
]]>
This last outing to find and photograph ruins and rock art was with my friend Laurent Martres and several other hiker/photographers from San Francisco and France. We spent five days hiking together and driving to remote locations of Cedar Mesa and Canyonlands National Park. The most strenuous effort included a fifteen + mile hike through Sheik, Bullet and Grand Gulch canyons. The highlight of the trip was photographing the Green Mask at the bottom of Sheik Canyon. 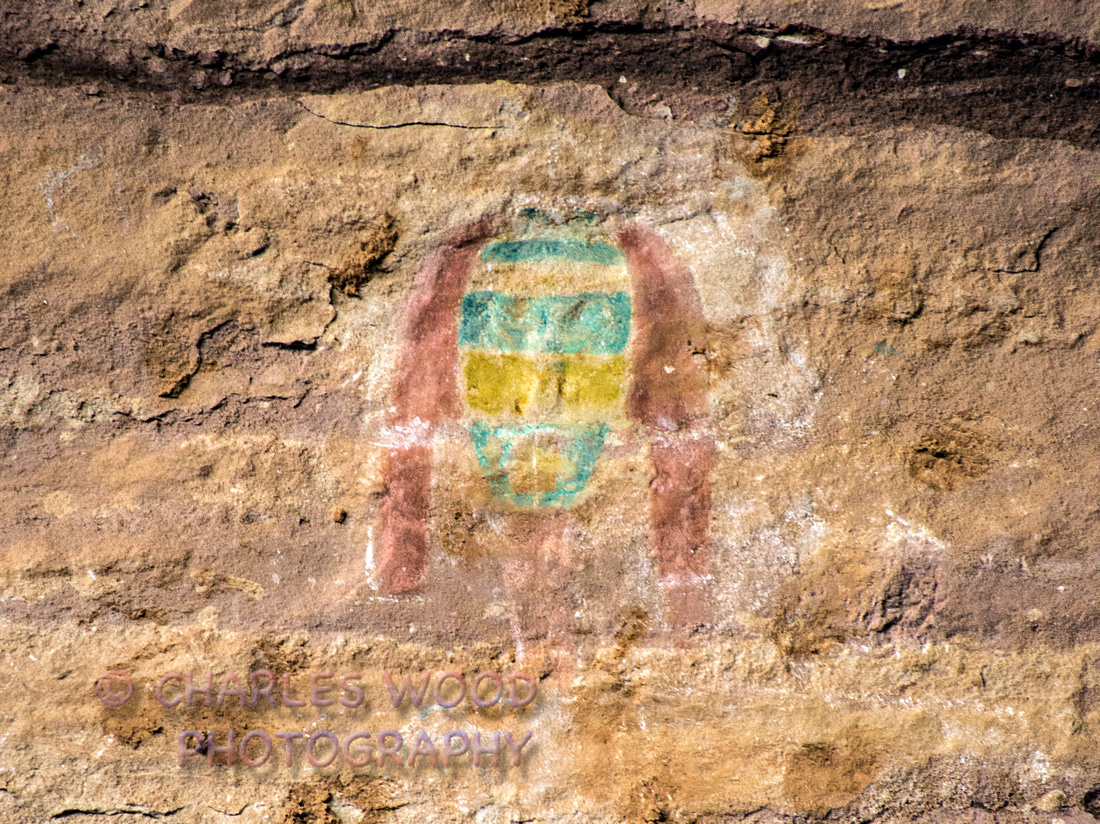 It's rare to find pictoglyphs in colors other than various dark earth tones. The Green Mask, located high up on a vertical wall, employs green and yellow dyes, as well as red. Amazingly, in spite of centuries of exposure to the elements and ultraviolet, the colors are still reasonably vivid.
One lesson I re-learned on the hike was the need to stay hydrated and eat snacks to maintain energy level. I let myself fall down on the energy curve and had it not been for a high carb energy gel with sugar and salts, I would have had a very difficult time making the last several miles. As it was, when we reached the exit point in Bullet Canyon, we were depending on GPS co-ordinates to lead us out through some obscured switchbacks up the canyon wall. Instead, our co-ordinates were for the entry point to the parking lot about a 1/4 mile away, causing us to delay finding the out point until almost dark. And at that point we had all run out of water. All of us in the group were/are experienced hikers/backpackers but it served as a reminder to us as to how quickly something can go terribly wrong, especially when depending on man made gadgets to get you safely home.
More of my images from this hike are located in the PUEBLOAN RUINS AND ROCK ART GALLERY. I'll be returning to SE Utah to photograph additional locations this fall...after summer temps moderate a bit.
]]>
The Colorado Plateau is a mecca for landscape photographers but there are a few tricks that enhance the results of any photographic effort, whether by a professional, advanced amateur or casual shooter.
Time of Day
Be prepared to miss some breakfast and dinners. The best light is from pre-sunrise to a half hour to hour afterwards and likewise, from an hour or so before sunset till after dusk. There will be dramatic changes in light during those periods and a given location will have many different looks when photographically captured.
Alpenglow
This period is pre-sunrise or dawn. It is identified by the pink/blue/magenta band of light that begins on the eastern horizon and travels westwards as the sun gets closer to sunrise. When the bands of color are overhead, the refracted light can create a warm, virtually shadowless look to landscapes. Your eye will hardly notice the color but with some experience, you can learn to recognize the brief period (5-10 minutes) that it exists at a given area. You will need a tripod to capture landscapes effectively during this period. It's beneficial to manually set your camera to a low ISO (100 or 200) to reduce noise and maintain resolution. But doing so will lengthen exposure time to well beyond what can be captured sharply while hand holding your camera.
Sunrise/Sunset
The first few minutes right after sunrise or just before sunset is the time the rendered colors will be the warmest or reddest. Sunlight is traveling through a much longer atmospheric path at this time of the day and the blue/green portions of the light spectrum are dramatically reduced. The warm light will make red rock formations 'pop' at this time of day. But it is important for best results to shoot a subject or location at 90 degrees to the direction of the sunlight. Doing so creates more apparent detail and interest in the resulting image. If you shoot facing 180 degrees away from the sunlight, the image will be flat without much shadow relief, the result will often be a lifeless image without much apparent detail.
Towards the goal of capturing a pleasing image, this all means you need to spend a bit of time scouting or researching a location to determine sunrise/sunset based on the time of year. Guidebooks are one solution, such as the photographic guidebooks published by Laurent Martres. Google and Google World can also be extremely useful for scouting and to have a look at how others have captured images of a specific area. You may frequently notice when looking at images in Google, is that many are typical snapshots, taken midday with not a lot of thought about sun angle or the harshness of midday sun. The more interesting shots that become something more than a documentary shot, are usually those that taken early or late in the day.
I will be away for a few days photographing additional locations, including rock art and ruins, in the Cedar Mesa and Canyonlands areas of SE Utah. In the meantime, have a look at my new Valley of Fire Gallery on my website.
]]>One of the most visited tourist spots on Moorea is Belvedere Overlook. A narrow, winding paved road will take you to this lookout point. I visited this spot multiple times to shoot at varying times of the day and weather conditions. Check out my ultra-wide panorama image in the French Polynesia gallery.
I would have liked to have enjoyed more time on the beaches as I remain a beach/water person at heart. As I've told others, my favorite locales are the desert American southwest and the tropics. And that explains to a great extent why I live in southwest Utah. I welcome comments and if you're in the St. George area this coming weekend, April 14/15, come out to Kayenta to take part in the Second Annual Chalk Art Festival. You'll see some amazing artists creating their art.
]]>Our first evening was spent at a working sheep station (ranch) near Arthur's Pass. The ranch restaurant was excellent and the room was essentially hostel style lodging in the bunkhouse where the staff lived, although we had a private room. Moving on the next day took us to Westport on the NW coast. We spent two days at a wonderful bed and breakfast, allowing us to explore the NW region a bit before heading southward past Franz Joseph glacier to the small town of Fox Glacier.
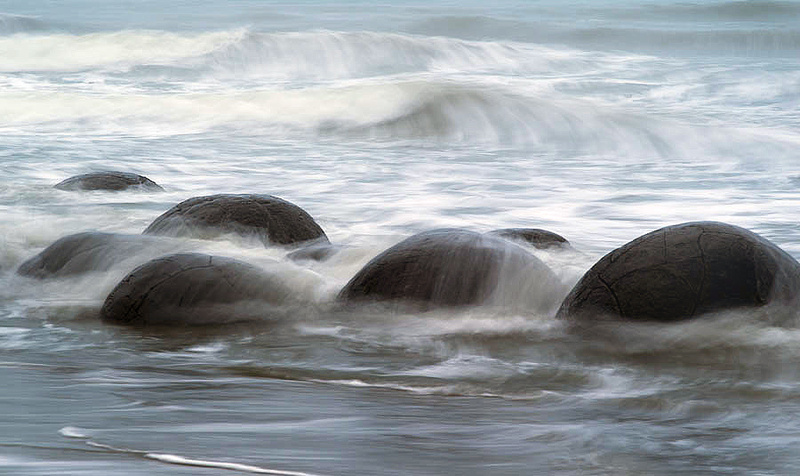
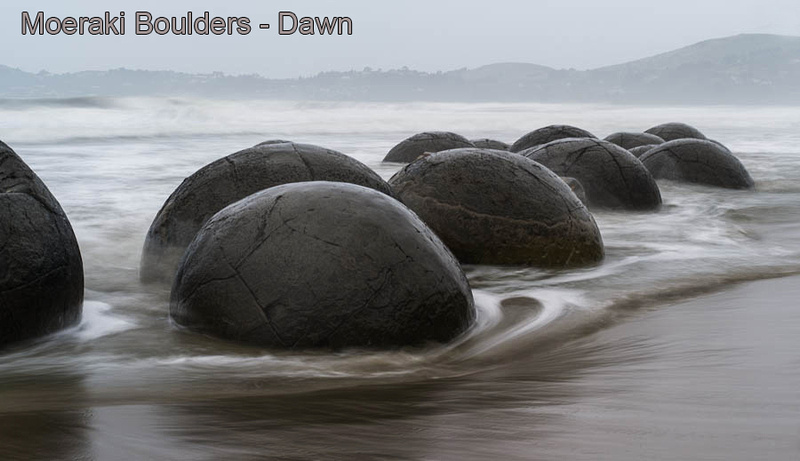
After an afternoon and morning of photography around Lake Matheson we moved on to the extremely scenic area around Lake Wanaka where we over nighted. The next day took over to the south east coast where I was particularly interested in photographing the famous Moeraki Boulders. These spherical boulders, buried in the sandy beach, have been formed much like oysters. A Google search will provide the precise details. The morning I photographed the Moeraki Boulders was wet with a steady, hard rain but I was pleased with my results nonetheless. Time exposures ranging from just under a second to four seconds allowed me to use the surf swirling around them to create moody effects. The most challenging aspect of the experience was avoiding getting surprised by the surf while working with my camera system. Several shots required setting up the camera on a tripod, starting the exposure, then after the exposure, quickly grabbing the camera/tripod and simply running away from the rapidly approaching surf. At some point I will process several of the Moeraki images as black and white.
Crossing the southern interior towards the southwest coast and the Fiordland National Park region, we arrived in the town of Te Anau, the commercial and tourist hub of the region. We made two day trips to the famous Milford Sound. Unfortunately, time, or lack of, prevented any hiking on the Milford Trek, considered by many trekkers as one of the great hikes in the world. Most landscape/nature photographers, myself included, consider blue, cloudless skies to be boring. Clouds can aid composition and prevent an image from being too dull or boring. Unfortunately, while we were in New Zealand, we experienced a period of exceptionally good weather with many days of near-cloudless blue skies. The locals loved it because parts of the south island normally have a weather pattern that often mirrors that of the US Pacific northwest. That is to say, rain and lots of it. Unfortunately, both days at Milford were pretty much blue skies.
So, where and what would I explore on a return trip? I would spend far more time on the NW coast of the south island. I would explore the north island, as well, and I would allow some time for serious trekking. Next time.....
]]>
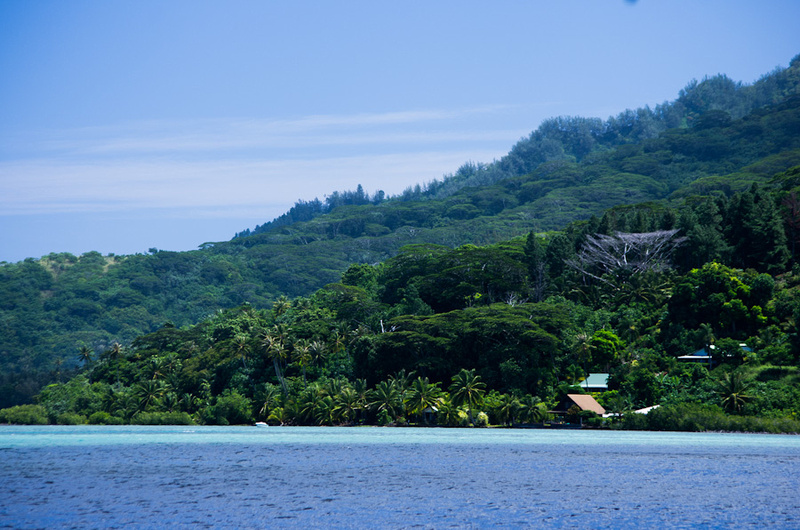
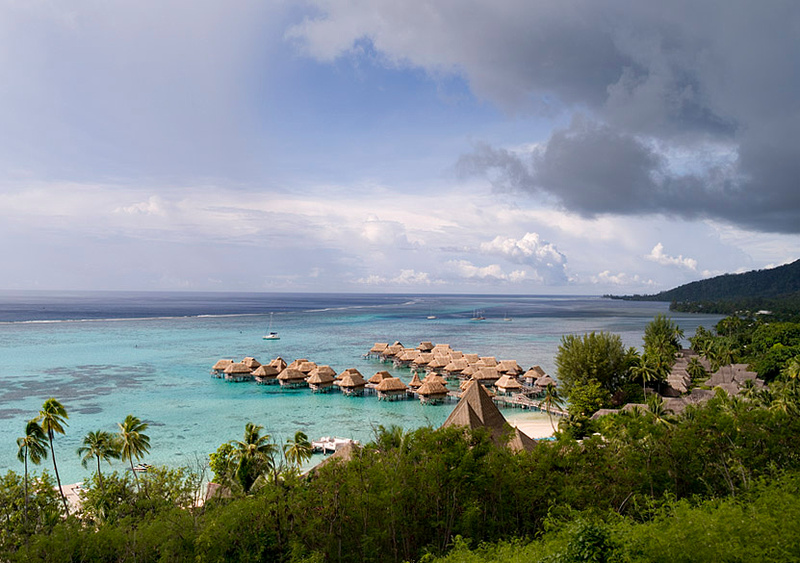 Moorea, however, has been much different. Is is much like comparing the Hawaiian islands of Maui and Molokai. They are two very different locations in terms of culture and development. I've kept my cameras, still and video, close at hand looking for unexpected opportunities while searching out known locations. On the morning of our first full day on Moorea I ventured up to Belvedere Point, arguably offering the best panoramic view of Cook's and Opunohu Bays. My goal was to create a panorama image that revealed what Moorea is all about: water, lush greenery, rugged peaks and dramatic light and clouds. The number of shades and intensity of green is amazing. Throw sand and the blue Pacific into the mix and it is almost visual overload.
Dawn was just breaking as I arrived after a steep, narrow climb in my rental car of about two miles or so. I was greeted by flickering lights in the trees and my first reaction was fireflies but then I stopped, heard very loud disco and hip hop music and discovered I had arrived at the wind down of an all night party of local younger types. The music and laser show was provided by a local sound company from a van that with an in-your-face logo exclaiming 'AMERICAN BASS', along with the brand names of recognizable audio manufacturers. Later when daylight arrived and I saw all of the debri left by regular Belvedere partiers, it became obvious this was a regularly occurring event.
Shortly after arriving the rain began and quickly became tropical torrential levels. This ended the party and soon I was left sitting in my car in the rain, waiting for the down pour to end. But it didn't, it went on for almost two hours well past sunrise hour. By the time daylight had arrived, the lush hillsides were alive with waterfalls. The lingering fog and mist never cleared that morning. I returned to the Intercontinental Hotel where the guests were lounging in the sun, playing with porpoises and generally doing the typical tourist thing. Later in the day I decided to venture back to Belvedere Point to attempt a late afternoon/sunset shoot. Arriving back in the area I discovered light rain and heavy cloud over. I was amazed that such heavy, ongoing rain could remain so localized for such a long period of time. So much for day one.
The morning of day two was a complete change stars evident in the early morning sky as I left the hotel to again head up to Belvedere Point. Cloud cover was broken and dramatically heavy but not enough to spoil the sunrise. The frames from that morning will become the panorama I was hoping to capture. Look for it when I post my Tahiti gallery on this site within the next week or so.
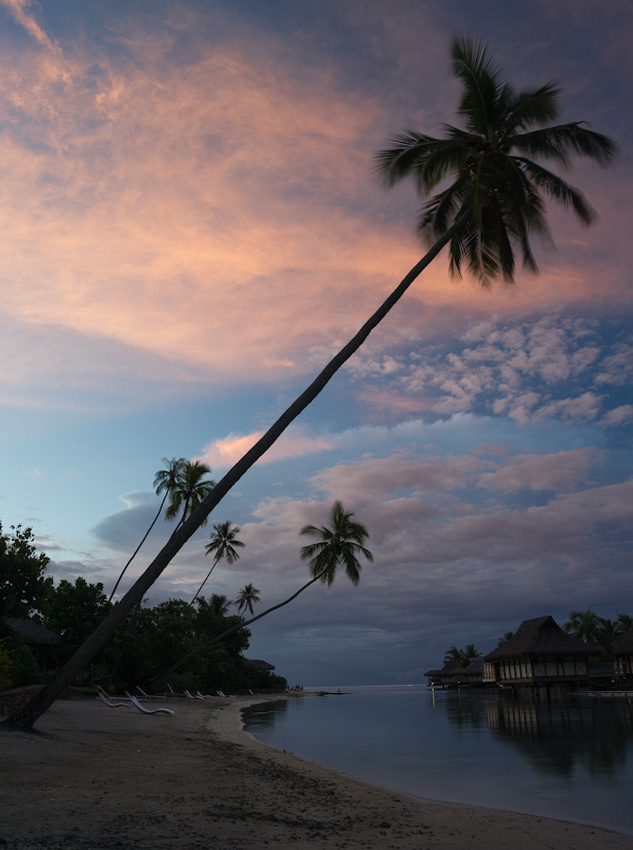
I really enjoy creating large, detailed panoramas that project an image of a large, open window, allowing you to almost walk into the scene. When shooting film I used large format cameras to create such scenes. With digital, even medium format digital, multiple frames are required to create a composite, stitched image with the same, or more, level of detail film systems offered. More about panorama stitching techniques in a future blog post. I leave for home later today and close this with a few obligatory cliche shots of beaches, the blue Pacific and palm trees.

]]>
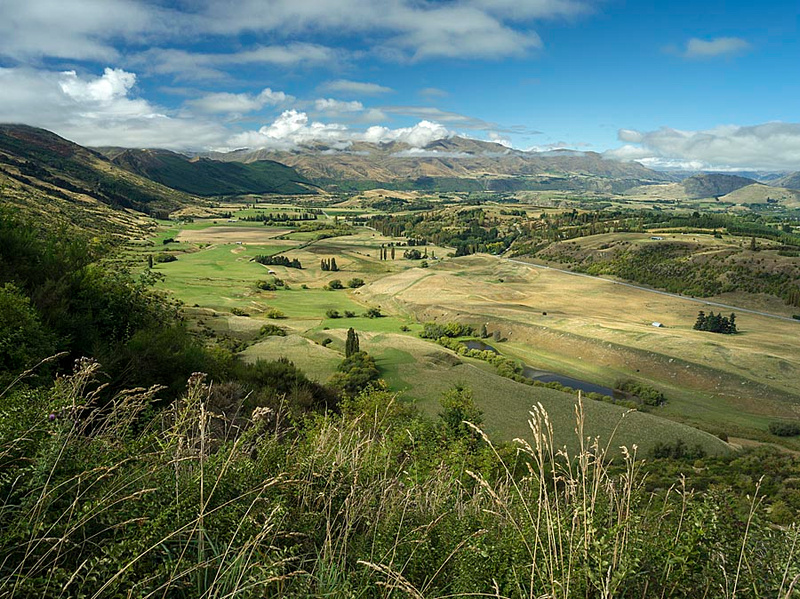
My intent for our last full day in New Zealand was to hang out and rest. The weather forecast indicated a day of hard rain and that is exactly how it started. But by noon the sun had broken out. One of the difficult problems with photography in the American southwest is the haze created by particulate pollution. New Zealand, having a smaller population and industrial base, particularly on the south island, simply has cleaner air, resulting in crisper, more contrasty distant views. When the rain stopped and the sun came through, the views were amazing. This shot was taken with my Pentax 645D digital medium format system.
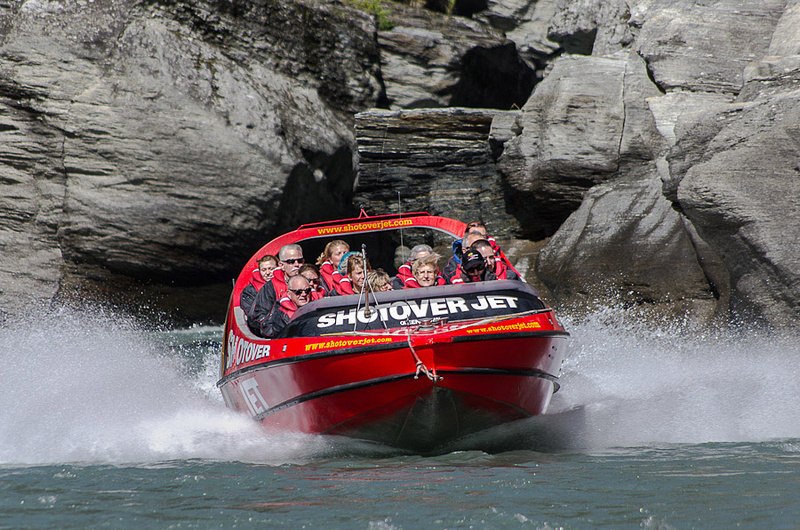
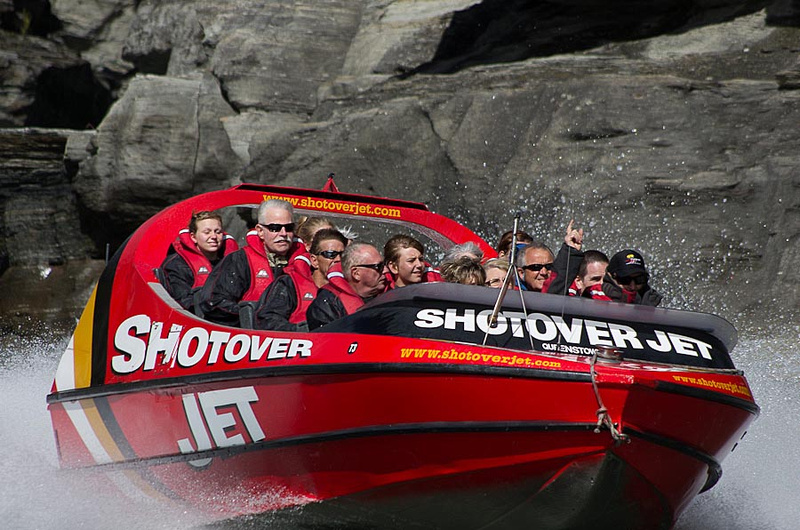
 We also dropped by the 'launch' site of the famous jet boat experience in Queenstown, literally about a mile from our hotel. It was almost as fun to watch as I am sure it was to participate. The shots below taken with Pentax K-5 DSLR, in a seven frames per second mode and image stabilization, handheld.
 That is all for now...we're off to the airport and our flight to Auckland where we connect with Air New Zealand to Tahiti and a few days on Moorea.
]]>
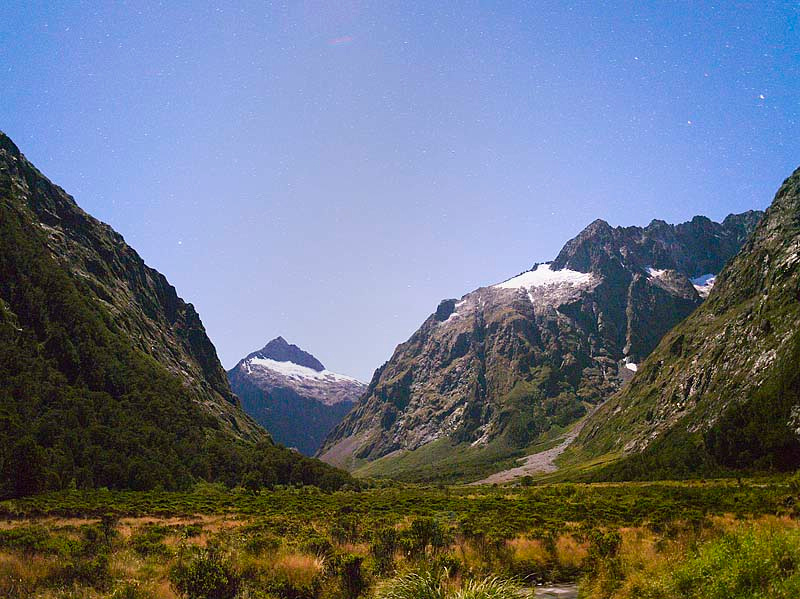
Shortly before reaching the summit and tunnel on the way to Milford, I took the opportunity for another night sky shot of the peaks and a glacier under a half moonlit morning about an hour before dawn.
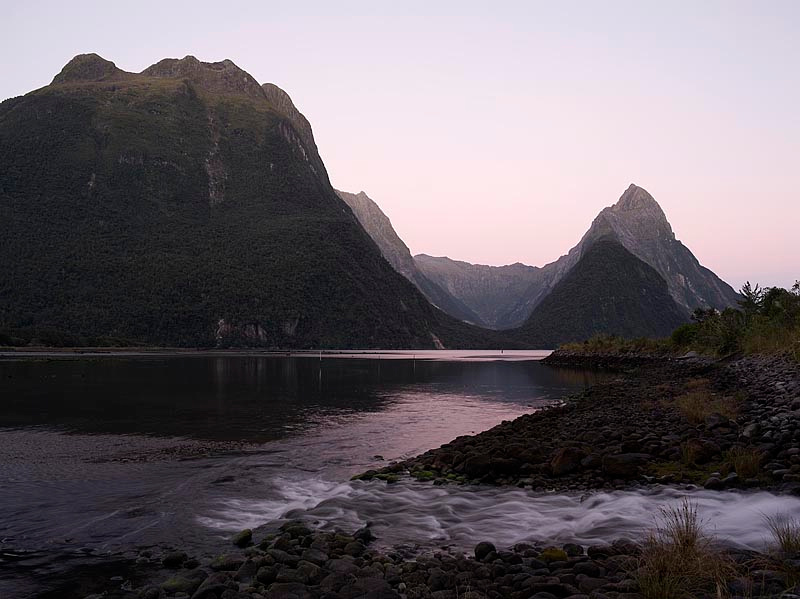
 After that time out we continued on to Milford. I wandered around checking out some of the known shooting spots and found none that really excited me. The real issue is the fact that shooting the sound I had to shoot in a westerly direction and sunrise is from the east. With a cloudless morning the sky is, needless to say, dull. Here is one shot of many from yesterday morning.
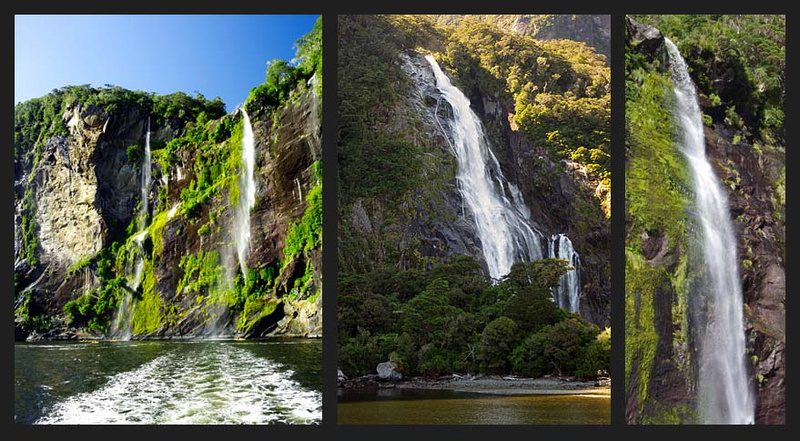
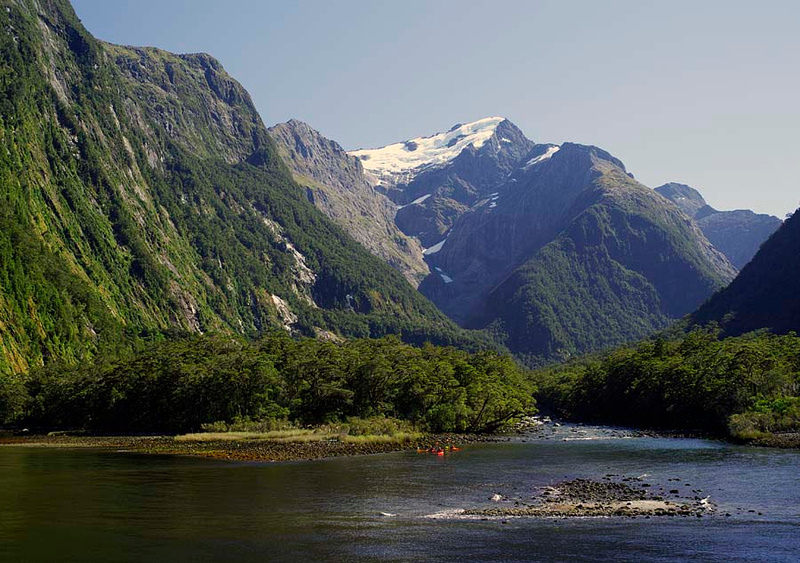
 With that obligatory effort out of the way we relaxed till our 10:15 am departure of our Milford Sound tour boat. We chose a small boat with a 2.5 hour tour. The boat ride around the sound was far more interesting than the sunrise and I heartily recommend a ride on the Milford Sound as a must do. Lots of waterfalls, seals, kayakers, more waterfalls, drinking glacier water, etc., and shot opportunities--even handheld without a tripod. Here are a few of those.
 Needless to say, I'll be creating a New Zealand gallery when I return and have had an opportunity to process all my images. Today we head to Queenstown to spend a couple of days before heading home with a stop in Tahiti.
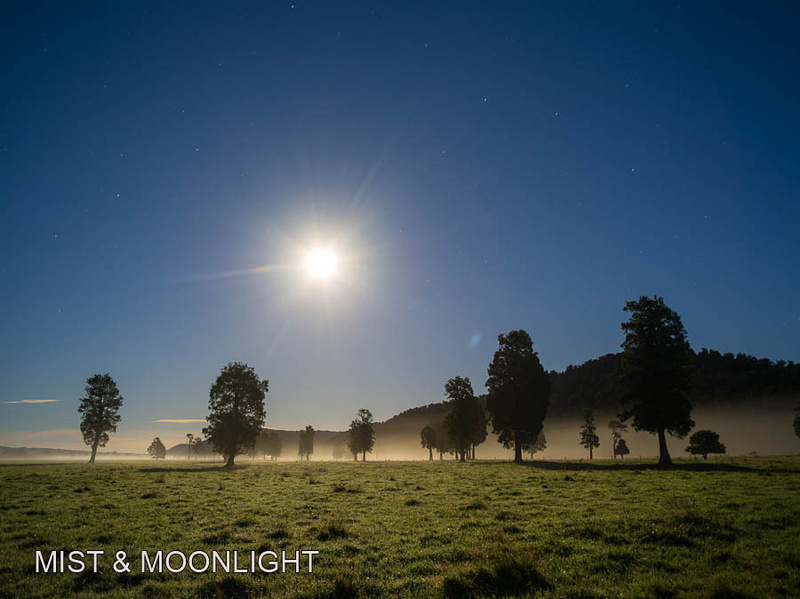
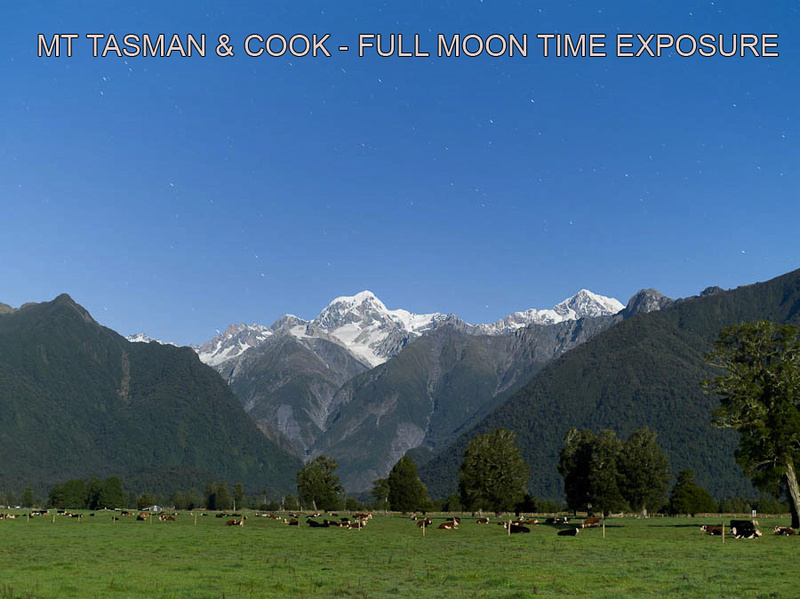
I also grabbed a shot of Mt Tasman and Mt Cook illuminated by the full moon. This shot almost looks like a daytime shot although the faint stars in the blue sky give it away as a night shot. The moonlight is the same color temperature, for all practical purposes, as sunlight, only dimmer, because it is reflected sunlight. All that is required to capture moonlight images is a tripod and a camera with manual controls allowing time exposures.
Two days later on the motor trek to Milford, we took a diversion to the southeast coastal town of Oamaru, just north of the beach that is the home of the Moeraki Boulders, spherical rocks that were formed on the seafloor bottom in a process similar in some respects to the way a pearl is formed. Do a Google search if you want to learn the details. They offer unique photographic opportunities but not during the midday when the tide is low and the tourists are out. The first picture is a mundane shot of one of the boulders in the afternoon, no water, just seaweed surrounding it. Not a particularly interesting picture. The next series of images were taken Sunday morning in a light rain, using a tripod and time exposures to allow the flowing water to create a silky, surrealistic look. The overcast steals almost all the color creating a monochromatic, black and white look to the images. I find them far more interesting than shots I took the previous afternoon.

I'm looking forward to some excellent landscape shooting while here in the Milford area...more to come in a few days.
]]>A midday flight took us from Auckland to Christchurch, where we picked up our rental car and headed for Arthur's Pass, about half way between Christchurch and the west coast of the south island. We spent the night at a working sheep ranch. Unfortunately, dark, overcast skies both at sunset and sunrise, eliminated any meaningful photo opportunities.
Tuesday
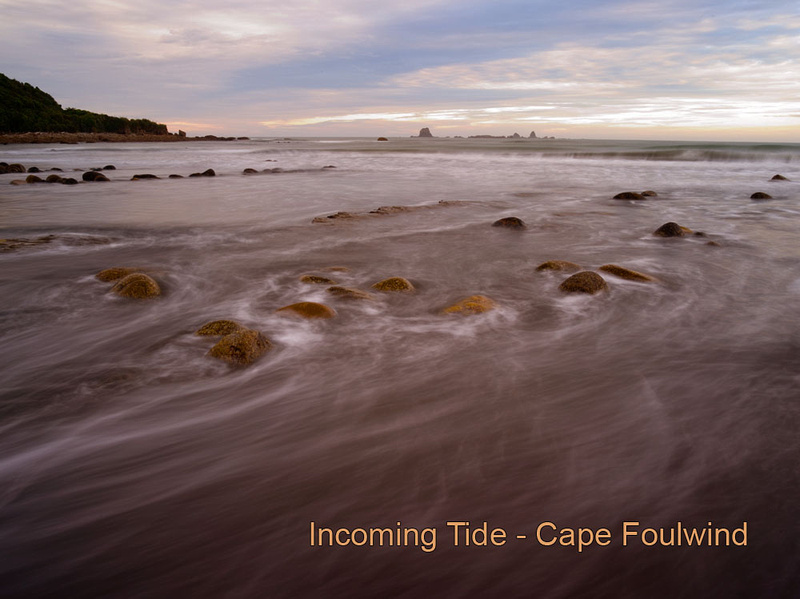
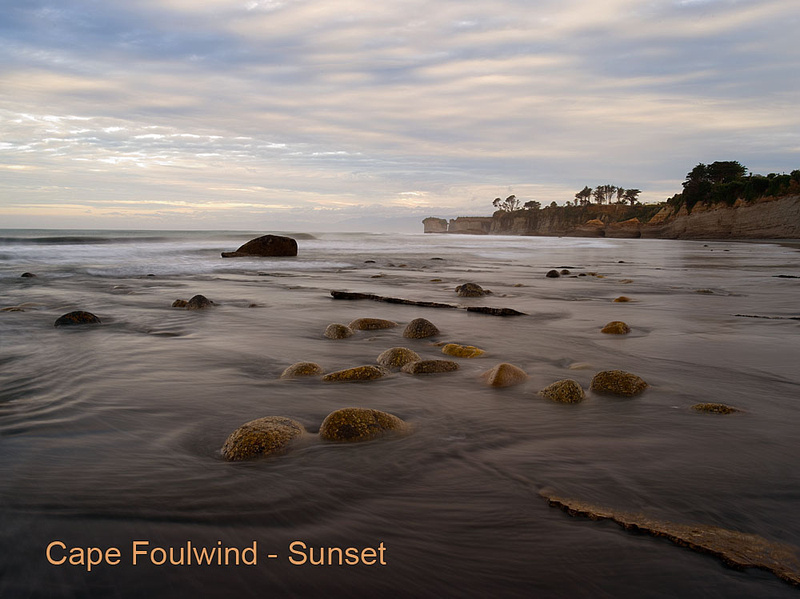
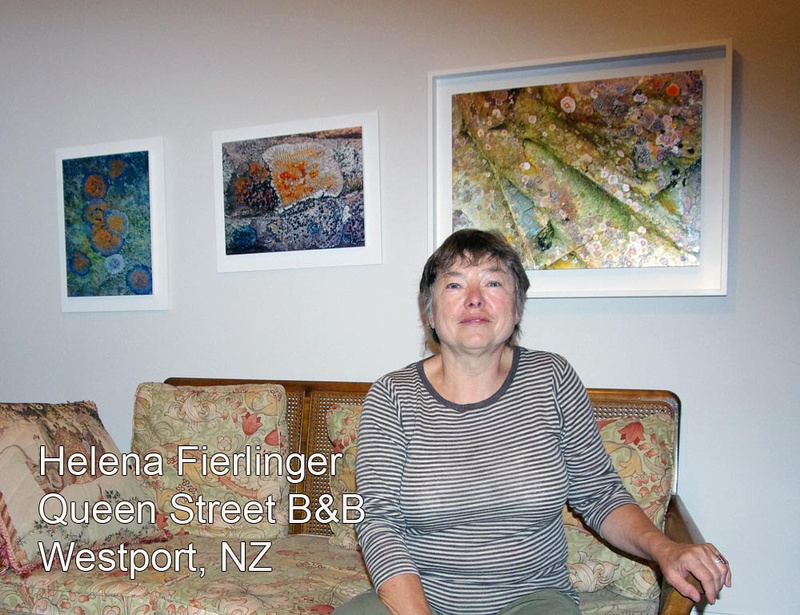
Leaving Arthur's Pass area in a light rain, we drove on up to Westport, on the NW New Zealand coast. The drive reminded us of the Oregon coast with lush, green vegetation. By late afternoon skies had brightened a bit and I spent sunset hours at Cape Foul Wind shooting some interesting rock and cliff formations. Then on to our stay at Queen Street B&B, with our hosts, Helena Fierlinger and Duncan Bennett. Coincidentally, both are accomplished photographers and we had some great conversations. Duncan has spent a great amount of time traveling, particularly in Antarctica and the Artic, as well as an eighteen month journey, literally around the world, shooting over 30,000 frames and all on film! Duncan is yet to be converted to digital although I sense he could be weakening.
Wednesday
We headed out early to Karamea on the NW coast and Kahurangi National Park to hike and photograph the limestone arches, which by the standards of the US National Park Service and the rangers at Arches National Park, would be judged as natural bridges rather than arches, as water runs underneath them. Regardless, very impressive and I spent several hours photographing with my 645D and K5 systems.
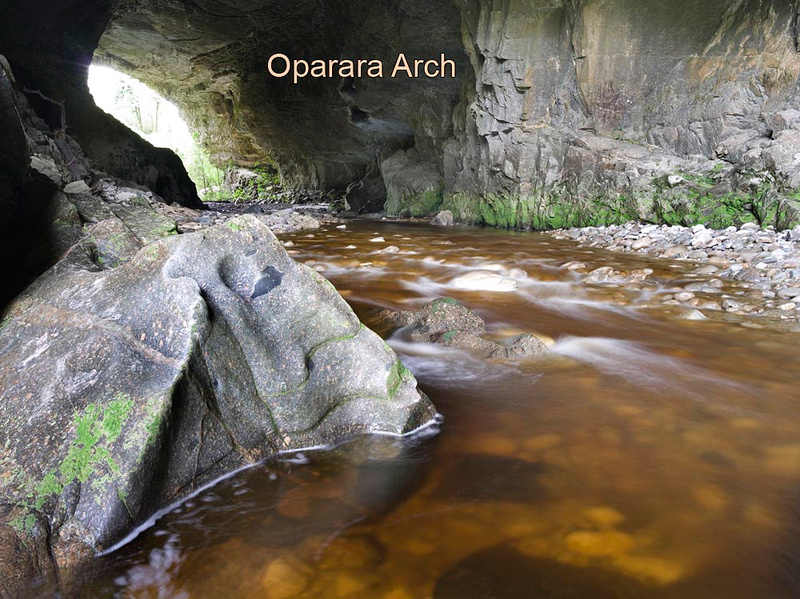
Also interesting was the very dark coffee-colored water as a result of the tannic acid deposited by decaying plant matter. Wishing we had more time for exploration, we left Karamea and headed south to Westport and our final night with Helena and Duncan.
Thursday
We drove south to Franz Joseph and Fox Glaciers. Some nice views but our first mild disappointments. Neither compare to the ice fields in Patagonia. Perito Moreno Glacier in Glaciers National Park, Argentina and Lago Grey Glacier in Torres del Paine, Chile, simply outclass them. But we did have a nice hike around Lake Matheson with shots of Mt. Tasman and Mt. Cook in the background.
More to come...time for bed and sleep.
]]>
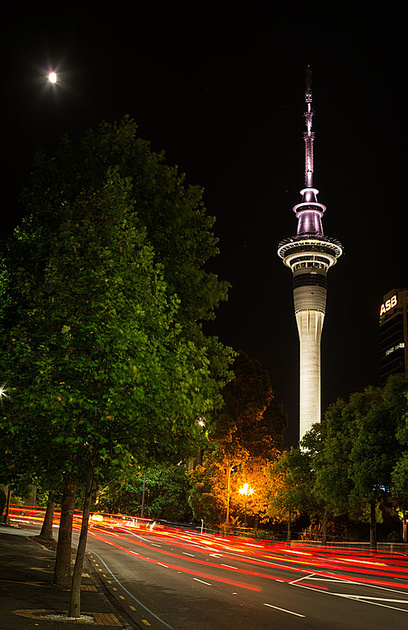
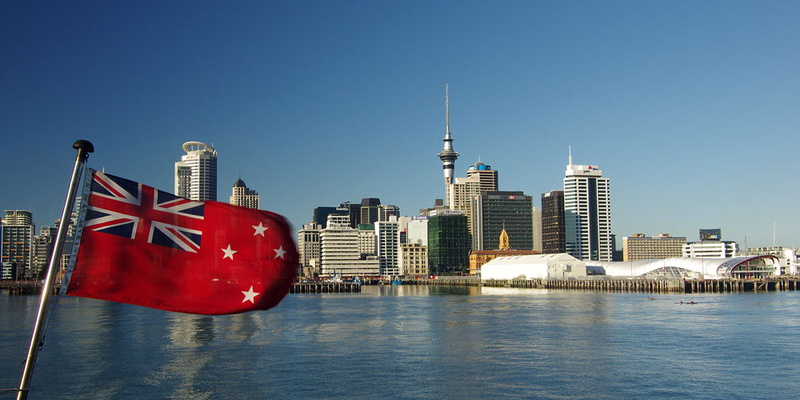
Kathy and I arrived at our hotel on Saturday morning Auckland time and fortunately, the hotel had a room and allowed us a very early check in. We spent most of the day resting and then a late afternoon walk down Queen's street, the commercial heart of Auckland. The Sky Tower is the visual center piece of the city, housing restaurants, hotels, broadcast and communications antennas, thrill rides, etc., Here's a shot I took last evening. It's a pretty stunning piece of architecture and the tallest man made object in New Zealand.
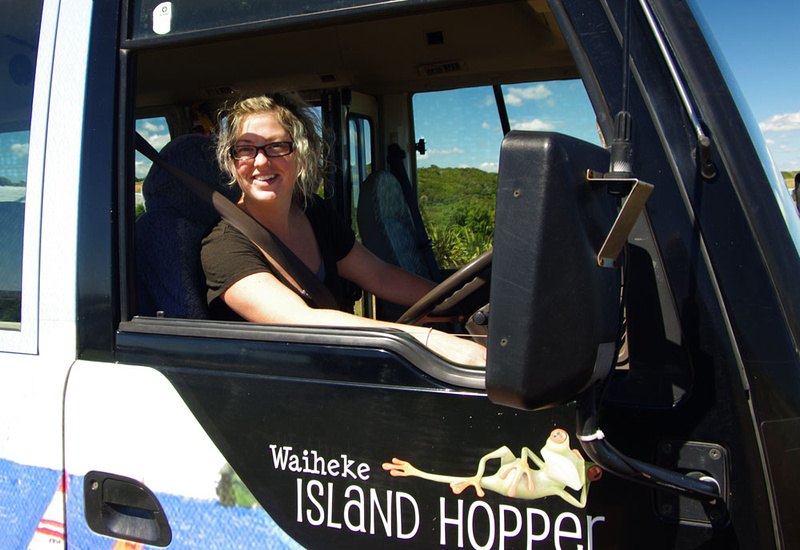
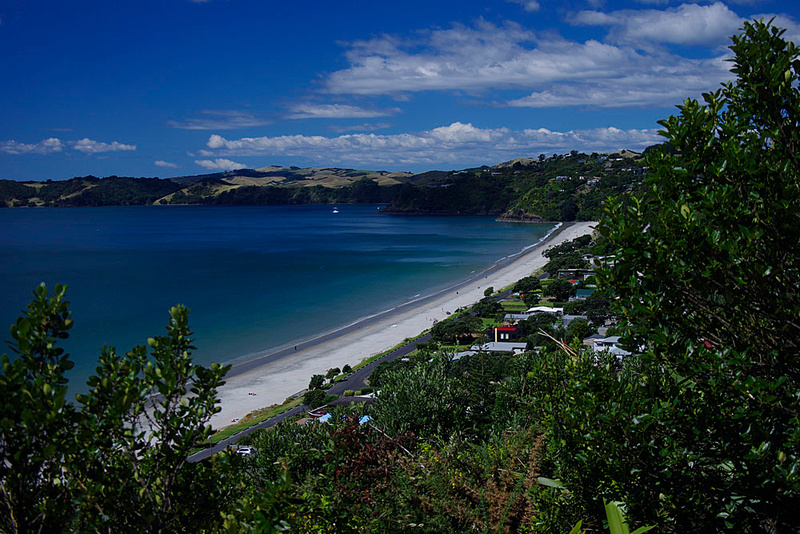
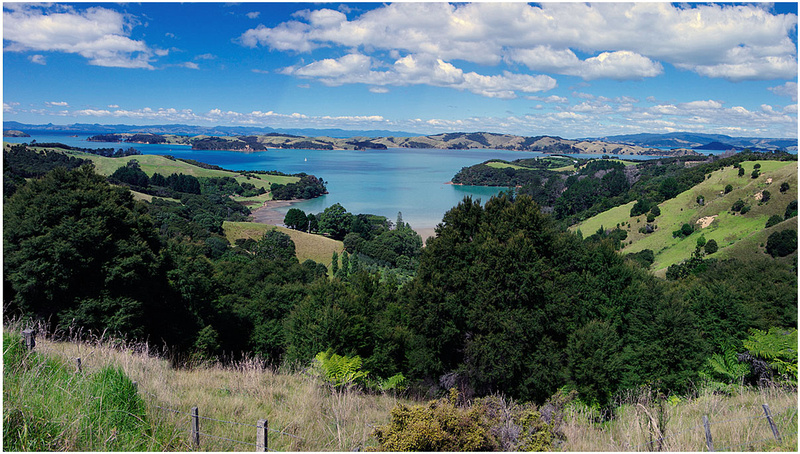
Today, we took the ferry over to Waiheke Island, about a 45 minute ride to a very beautiful, rural island with about 8,000 inhabitants and spectacular ocean views. By the end of the day after touring the island we were ready for more rest. Some view of the islands below along with a picture of Emma, our driver, who coincidentally has spent much time in the American Southwest hiking and working in Page, Arizona as well as the Grand Canyon. More to come when we get 'settled' on New Zealand's south island tomorrow.
I want to take this time to explain how I print my images. After initially processing the image in Adobe Light Room 3.0., I save the image in a folder as a Photoshop PSD file as well as DNG and TIFF formats. If I upload the image to my website, I save it as a high resolution JPG with minimum compression.
When I print the image myself I re-size and sharpen the image as a 16 bit TIFF file. I then send the image to the printer which is a 44" wide Canon ImagePrograf 8300. This printer utilizes twelve 700 milliliter pigment ink cartridges. Pigment ink technology has evolved to the point the inks employed by any of the major printer manufacturers (Canon, HP, Epson) can create prints that properly treated can last well over 100 years without fading.
I chose the Canon 8300 based on my very positive experience with a prior Canon ipf8000. The printer is extremely reliable, never suffers from head clogs and if I have a question I can call Canon and get a very quick response from staff at their call center in Virginia. The downside of the printer is physical size. It's approximately 75" wide, 36" deep and weighs about 350 pounds. But the image quality it delivers makes it all worthwhile.

After I finish printing, usually once or twice a week, I let the prints cure for about 24 hours to allow all the inks on the paper or canvas surface to out gas. When I print on canvas I typically use a type manufactured by Breathing Color, a company based in Australia with offices and distribution here in the US. I use LYVE, their premium grade of canvas which reproduces as wide a color gamut as any canvas currently available. The canvas is 'museum grade' in terms of archival/long lasting qualities.
After my prints have cured ( I usually accumulate a number) I spray coat them with a water soluble polymer solution using an HVLP spray gun. Polymers by their nature reject UV. The coating not only protects the ink surface from minor scuffs and abrasions but offers additional UV protection as well.
After the prints are coated, I allow them to cure 24 hours before having them stretched over frames by Sunset Framer in St. George, Utah. I tend to not be confined by standard aspect ratios and depending on aesthetic judgements as to how I crop an image, off the shelf pre-cut stretcher bars may not be available. Sunset Framer builds custom frames for my specific needs, stretches the print, attaches the hardware and makes it ready for the customer to hang in his/her home.
I personally prefer a canvas presentation for a number of reasons:
Archival/longevity, no glass thus no reflections, eliminates need for matting and traditional framing, more cost effective when large mural size images are required and the impact of colorful, rich images that typically are only achieved with glossy papers but without reflection issues. I realize some people may prefer traditional paper prints and I gladly offer any of my images on fine art papers, as well.
I'm headed to New Zealand later this week. Check in as I'll post on a regular basis along with selected images as the trip progresses.
![]()
I purchased a Pentax 645N in 1998. I still own this camera and the associated lenses that go with it. For the last 14 years it has been absolutely reliable and has traveled the world with me in planes and backpacks. Another classic but somewhat exotic camera that I enjoyed using immensely was a Fuji G617 medium format panorama camera. The G617 delivered images on 120/220 roll film nearly 7 inches wide that are for all practical purposes about half the frame size of a 5x7 view camera frame and properly scanned and printed, can deliver wall sized prints 9-10 feet wide with outstanding sharpness. Many of the panorama images I display in my gallery, such as my Monument Valley Totem Sunrise, were shot with a G617.
Not wanting to be left behind in evolving technologies and having a technical background in my other careers, early on I purchased a digital Nikon CoolPix point and shoot camera. It had a sensor all of 2 megs in size but it made created very nice 5x7 prints, was great for family snapshots and that type of thing. Later the CoolPix went on to one of my nieces and was replaced by a 5 meg Olympus C5050, definitely a step up in quality and capable of nice 8x10 prints. I still offer for sale an image that I captured with the Olympus and it holds up well when I don't push the size limitations of the file.
By 2004 I decided to take a baby step into more serious digital photography with an early 8 megapixel Canon Rebel XT along with some Canon L series professional lenses. I knew bodies were going to change and evolve rapidly but lenses far less, so I felt comfortable investing in expensive lenses rather than expensive bodies. The opposite approach is a mistake many photographers continue to make...while the camera body is important, the lenses can be the critical element in capturing a stunning image. Over the last few years I've owned various Canon consumer and professional bodies. The XT, then an XTi and then a 40D followed by an XSi and 5DmkIl. Each step brought incremental improvements, particularly so with the 5Dmkll.