WELCOME TO MY BLOG...MY THOUGHTS ON LANDSCAPE, TRAVEL AND NATURE PHOTOGRAPHY PLUS SOME HINTS ON GEAR AND PHOTOGRAPHY IN GENERAL
SUMMER UPDATE
It has been awhile since my last blog post. After catching up from my New Zealand/French Polynesia trip of last March, I spent about a week in late spring in the Cedar Mesa and Canyonlands areas photographing Native American rock art and ruins. There are a small number of images in that category that consistently are photographed and exhibited by landscape photographers. I find it more interesting when I'm able to travel and hike with individuals who are a bit more expert in locating these hidden bits of history, and capture images that are not so well known.
This last outing to find and photograph ruins and rock art was with my friend Laurent Martres and several other hiker/photographers from San Francisco and France. We spent five days hiking together and driving to remote locations of Cedar Mesa and Canyonlands National Park. The most strenuous effort included a fifteen + mile hike through Sheik, Bullet and Grand Gulch canyons. The highlight of the trip was photographing the Green Mask at the bottom of Sheik Canyon. 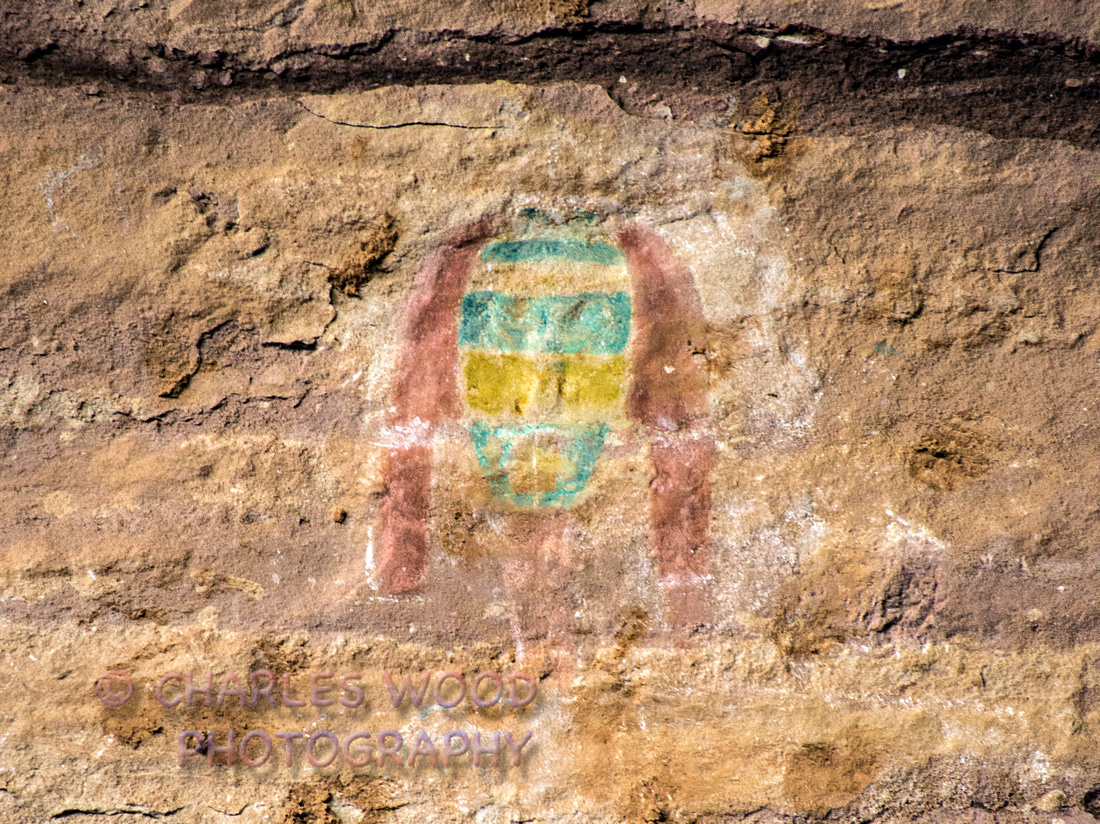
 It's rare to find pictoglyphs in colors other than various dark earth tones. The Green Mask, located high up on a vertical wall, employs green and yellow dyes, as well as red. Amazingly, in spite of centuries of exposure to the elements and ultraviolet, the colors are still reasonably vivid.
One lesson I re-learned on the hike was the need to stay hydrated and eat snacks to maintain energy level. I let myself fall down on the energy curve and had it not been for a high carb energy gel with sugar and salts, I would have had a very difficult time making the last several miles. As it was, when we reached the exit point in Bullet Canyon, we were depending on GPS co-ordinates to lead us out through some obscured switchbacks up the canyon wall. Instead, our co-ordinates were for the entry point to the parking lot about a 1/4 mile away, causing us to delay finding the out point until almost dark. And at that point we had all run out of water. All of us in the group were/are experienced hikers/backpackers but it served as a reminder to us as to how quickly something can go terribly wrong, especially when depending on man made gadgets to get you safely home.
More of my images from this hike are located in the PUEBLOAN RUINS AND ROCK ART GALLERY. I'll be returning to SE Utah to photograph additional locations this fall...after summer temps moderate a bit.
SOME TIPS FOR SUMMER PHOTOGRAPHY
I recently spent some time photographing locations in Valley of Fire State Park, east of Las Vegas. This particular location offers some dramatic opportunities for red rock shooting and is located on the western edge of the Colorado Plateau. The Colorado Plateau is the region defined by geologists which encompasses large areas of Western Colorado, NW New Mexico, Northern Arizona, Southern/Eastern Utah and South East Nevada. Although Grand Canyon National Park has a different look and feel than Arches National Park, the various locations within this region share one common theme and that is a landscape comprised of various types of red sandstone.
The Colorado Plateau is a mecca for landscape photographers but there are a few tricks that enhance the results of any photographic effort, whether by a professional, advanced amateur or casual shooter.
Time of Day
Be prepared to miss some breakfast and dinners. The best light is from pre-sunrise to a half hour to hour afterwards and likewise, from an hour or so before sunset till after dusk. There will be dramatic changes in light during those periods and a given location will have many different looks when photographically captured.
Alpenglow
This period is pre-sunrise or dawn. It is identified by the pink/blue/magenta band of light that begins on the eastern horizon and travels westwards as the sun gets closer to sunrise. When the bands of color are overhead, the refracted light can create a warm, virtually shadowless look to landscapes. Your eye will hardly notice the color but with some experience, you can learn to recognize the brief period (5-10 minutes) that it exists at a given area. You will need a tripod to capture landscapes effectively during this period. It's beneficial to manually set your camera to a low ISO (100 or 200) to reduce noise and maintain resolution. But doing so will lengthen exposure time to well beyond what can be captured sharply while hand holding your camera.
Sunrise/Sunset
The first few minutes right after sunrise or just before sunset is the time the rendered colors will be the warmest or reddest. Sunlight is traveling through a much longer atmospheric path at this time of the day and the blue/green portions of the light spectrum are dramatically reduced. The warm light will make red rock formations 'pop' at this time of day. But it is important for best results to shoot a subject or location at 90 degrees to the direction of the sunlight. Doing so creates more apparent detail and interest in the resulting image. If you shoot facing 180 degrees away from the sunlight, the image will be flat without much shadow relief, the result will often be a lifeless image without much apparent detail.
Towards the goal of capturing a pleasing image, this all means you need to spend a bit of time scouting or researching a location to determine sunrise/sunset based on the time of year. Guidebooks are one solution, such as the photographic guidebooks published by Laurent Martres. Google and Google World can also be extremely useful for scouting and to have a look at how others have captured images of a specific area. You may frequently notice when looking at images in Google, is that many are typical snapshots, taken midday with not a lot of thought about sun angle or the harshness of midday sun. The more interesting shots that become something more than a documentary shot, are usually those that taken early or late in the day.
I will be away for a few days photographing additional locations, including rock art and ruins, in the Cedar Mesa and Canyonlands areas of SE Utah. In the meantime, have a look at my new Valley of Fire Gallery on my website.
FRENCH POLYNESIA: ON MY LIST OF PLACES TO RETURN
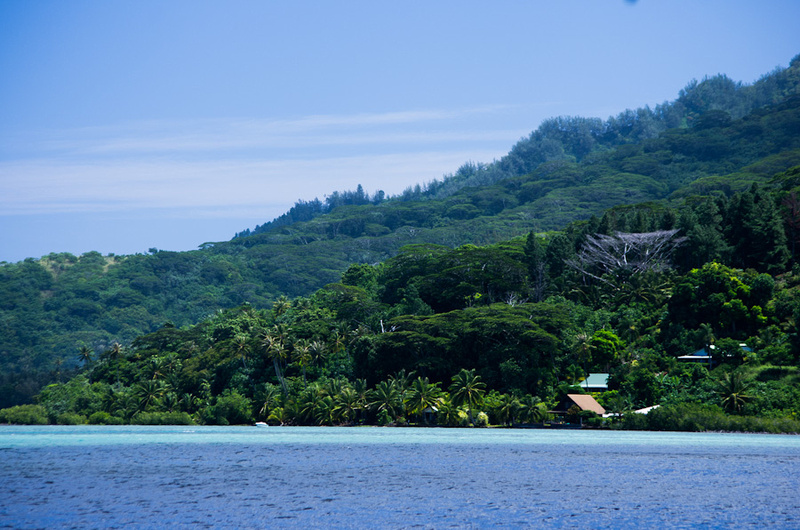
I've just posted a few of my favorite images from my recent trip to French Polynesia, specifically Tahiti and Moorea. While Tahiti was enjoyable, the traffic jams and development reminded me of Southern California, but with French signage. Moorea, on the other hand, still remains a tropical paradise for those of us use to four seasons of weather.
One of the most visited tourist spots on Moorea is Belvedere Overlook. A narrow, winding paved road will take you to this lookout point. I visited this spot multiple times to shoot at varying times of the day and weather conditions. Check out my ultra-wide panorama image in the French Polynesia gallery.
I would have liked to have enjoyed more time on the beaches as I remain a beach/water person at heart. As I've told others, my favorite locales are the desert American southwest and the tropics. And that explains to a great extent why I live in southwest Utah. I welcome comments and if you're in the St. George area this coming weekend, April 14/15, come out to Kayenta to take part in the Second Annual Chalk Art Festival. You'll see some amazing artists creating their art.
NEW ZEALAND: MY SUMMARY
I have just created a New Zealand gallery providing a chronological representation of the travels of my wife and I during our two weeks in New Zealand. The images also represent my personal favorites from our travel on the south island. We were able to experience a handful of the places we would have ultimately visited had time allowed. We began our journey by spending a couple of days in Auckland to unwind from the long flight and nearby sights. After recuperating, we flew to Christchurch where we picked up our rental vehicle and drove towards the interior.
Our first evening was spent at a working sheep station (ranch) near Arthur's Pass. The ranch restaurant was excellent and the room was essentially hostel style lodging in the bunkhouse where the staff lived, although we had a private room. Moving on the next day took us to Westport on the NW coast. We spent two days at a wonderful bed and breakfast, allowing us to explore the NW region a bit before heading southward past Franz Joseph glacier to the small town of Fox Glacier.
After an afternoon and morning of photography around Lake Matheson we moved on to the extremely scenic area around Lake Wanaka where we over nighted. The next day took over to the south east coast where I was particularly interested in photographing the famous Moeraki Boulders. These spherical boulders, buried in the sandy beach, have been formed much like oysters. A Google search will provide the precise details. The morning I photographed the Moeraki Boulders was wet with a steady, hard rain but I was pleased with my results nonetheless. Time exposures ranging from just under a second to four seconds allowed me to use the surf swirling around them to create moody effects. The most challenging aspect of the experience was avoiding getting surprised by the surf while working with my camera system. Several shots required setting up the camera on a tripod, starting the exposure, then after the exposure, quickly grabbing the camera/tripod and simply running away from the rapidly approaching surf. At some point I will process several of the Moeraki images as black and white.
Crossing the southern interior towards the southwest coast and the Fiordland National Park region, we arrived in the town of Te Anau, the commercial and tourist hub of the region. We made two day trips to the famous Milford Sound. Unfortunately, time, or lack of, prevented any hiking on the Milford Trek, considered by many trekkers as one of the great hikes in the world. Most landscape/nature photographers, myself included, consider blue, cloudless skies to be boring. Clouds can aid composition and prevent an image from being too dull or boring. Unfortunately, while we were in New Zealand, we experienced a period of exceptionally good weather with many days of near-cloudless blue skies. The locals loved it because parts of the south island normally have a weather pattern that often mirrors that of the US Pacific northwest. That is to say, rain and lots of it. Unfortunately, both days at Milford were pretty much blue skies.
So, where and what would I explore on a return trip? I would spend far more time on the NW coast of the south island. I would explore the north island, as well, and I would allow some time for serious trekking. Next time.....
MY IMAGE OF MOOREA
Papeete, Tahiti, was just as I had been told, crowded and expensive. Completing an exploratory circle of the island on our first day there, we found ourselves in a rush hour traffic jam in Papeete that rivaled LA or Washington, DC. Papeete was not my idea of how to spend quality time in the tropics.
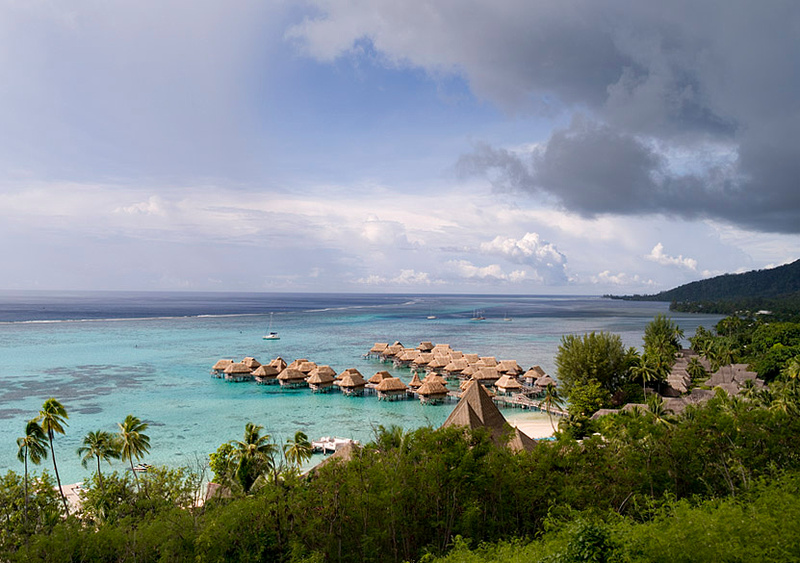 Moorea, however, has been much different. Is is much like comparing the Hawaiian islands of Maui and Molokai. They are two very different locations in terms of culture and development. I've kept my cameras, still and video, close at hand looking for unexpected opportunities while searching out known locations. On the morning of our first full day on Moorea I ventured up to Belvedere Point, arguably offering the best panoramic view of Cook's and Opunohu Bays. My goal was to create a panorama image that revealed what Moorea is all about: water, lush greenery, rugged peaks and dramatic light and clouds. The number of shades and intensity of green is amazing. Throw sand and the blue Pacific into the mix and it is almost visual overload.
Dawn was just breaking as I arrived after a steep, narrow climb in my rental car of about two miles or so. I was greeted by flickering lights in the trees and my first reaction was fireflies but then I stopped, heard very loud disco and hip hop music and discovered I had arrived at the wind down of an all night party of local younger types. The music and laser show was provided by a local sound company from a van that with an in-your-face logo exclaiming 'AMERICAN BASS', along with the brand names of recognizable audio manufacturers. Later when daylight arrived and I saw all of the debri left by regular Belvedere partiers, it became obvious this was a regularly occurring event.
Shortly after arriving the rain began and quickly became tropical torrential levels. This ended the party and soon I was left sitting in my car in the rain, waiting for the down pour to end. But it didn't, it went on for almost two hours well past sunrise hour. By the time daylight had arrived, the lush hillsides were alive with waterfalls. The lingering fog and mist never cleared that morning. I returned to the Intercontinental Hotel where the guests were lounging in the sun, playing with porpoises and generally doing the typical tourist thing. Later in the day I decided to venture back to Belvedere Point to attempt a late afternoon/sunset shoot. Arriving back in the area I discovered light rain and heavy cloud over. I was amazed that such heavy, ongoing rain could remain so localized for such a long period of time. So much for day one.
The morning of day two was a complete change stars evident in the early morning sky as I left the hotel to again head up to Belvedere Point. Cloud cover was broken and dramatically heavy but not enough to spoil the sunrise. The frames from that morning will become the panorama I was hoping to capture. Look for it when I post my Tahiti gallery on this site within the next week or so.
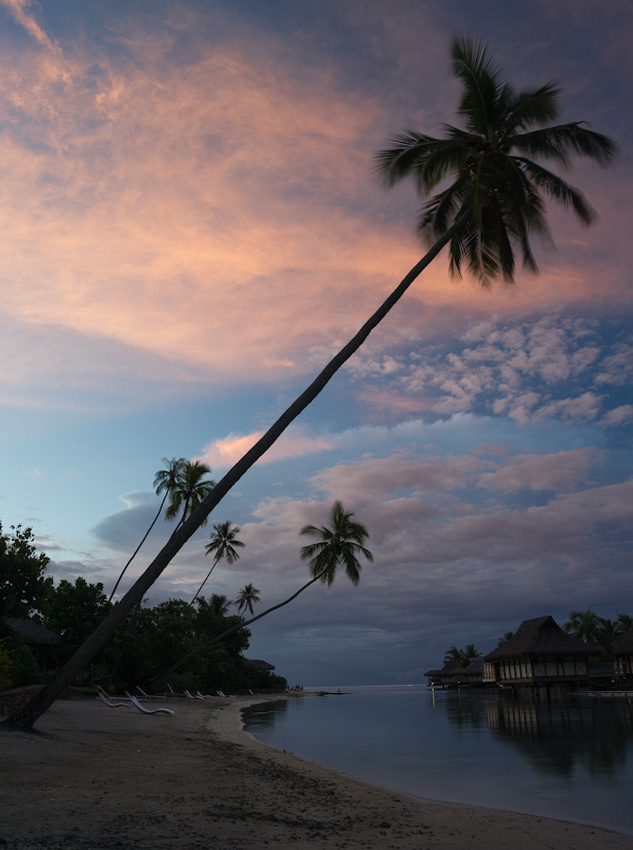
I really enjoy creating large, detailed panoramas that project an image of a large, open window, allowing you to almost walk into the scene. When shooting film I used large format cameras to create such scenes. With digital, even medium format digital, multiple frames are required to create a composite, stitched image with the same, or more, level of detail film systems offered. More about panorama stitching techniques in a future blog post. I leave for home later today and close this with a few obligatory cliche shots of beaches, the blue Pacific and palm trees.